
Below is a snapshot of the processes involved...
Casting Techniques / Process
Sprues
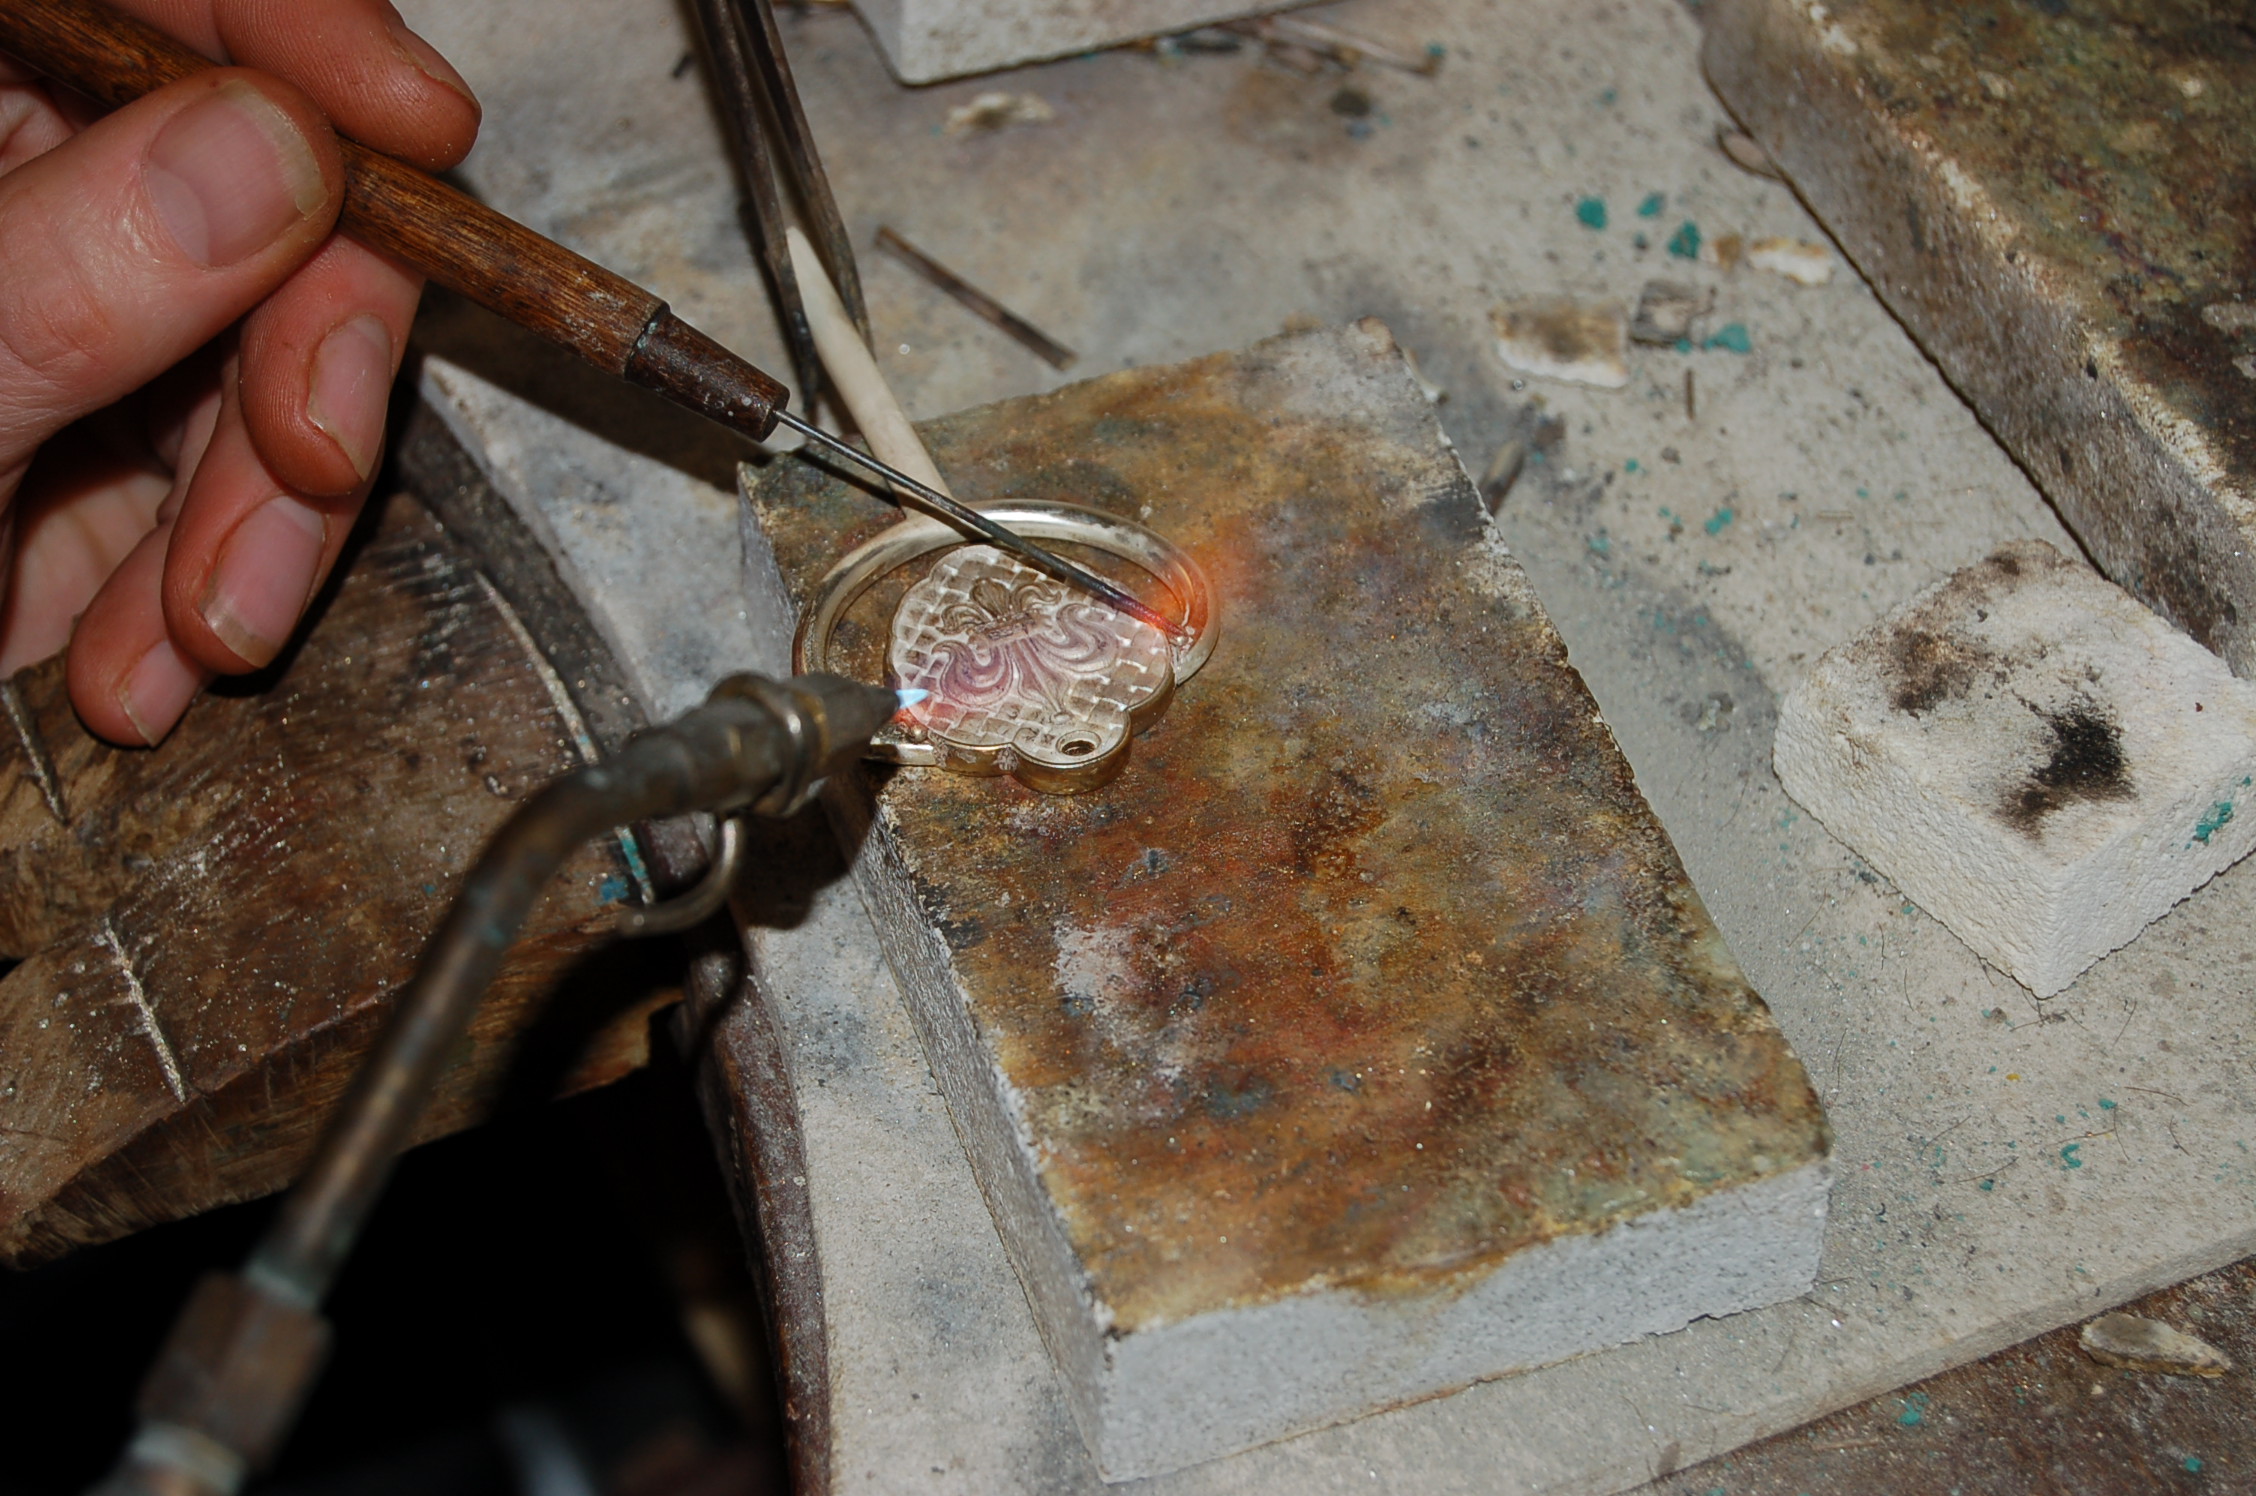
The sprue, or feed design is crucial for a successful casting. The laws of physics cannot be defied. The principles are quite simple. During the solidification period of any casting, it is vital that a constant and free flow of molten liquid metal can be supplied to the casting for at least as long as it takes for the casting to form to totally complete the solidification process. Once this process is understood the following is simple logic. The primary feed should always go into the largest mass/section of the casting form. The feed should always be round in section, and of a diameter that exceeds the greatest cross sections being filled. There are of course variations to this principle when multi feed points are needed, or the section is light weight and / or thin and the feed must be transformed from round to a shape that can be fitted to the object.
Often client models have feeds that have been, "necked", this habit should be avoided, as this will result in shrinkage porosity. At Hean Studio we often have to modify the feeds on client models, and we have skilled staff who are able to carry out this operation.
Feed material made of copper or brass should be avoided as this reacts with the sulphur in the rubber compound and as such the rubber sticks to these materials. Upon removal, the surface will be roughened, and is not helpful.


Moulding
Every master model that is submitted is carefully evaluated before being embedded in a mould. As mentioned the feed design may need to be modified from that which the client has attached.
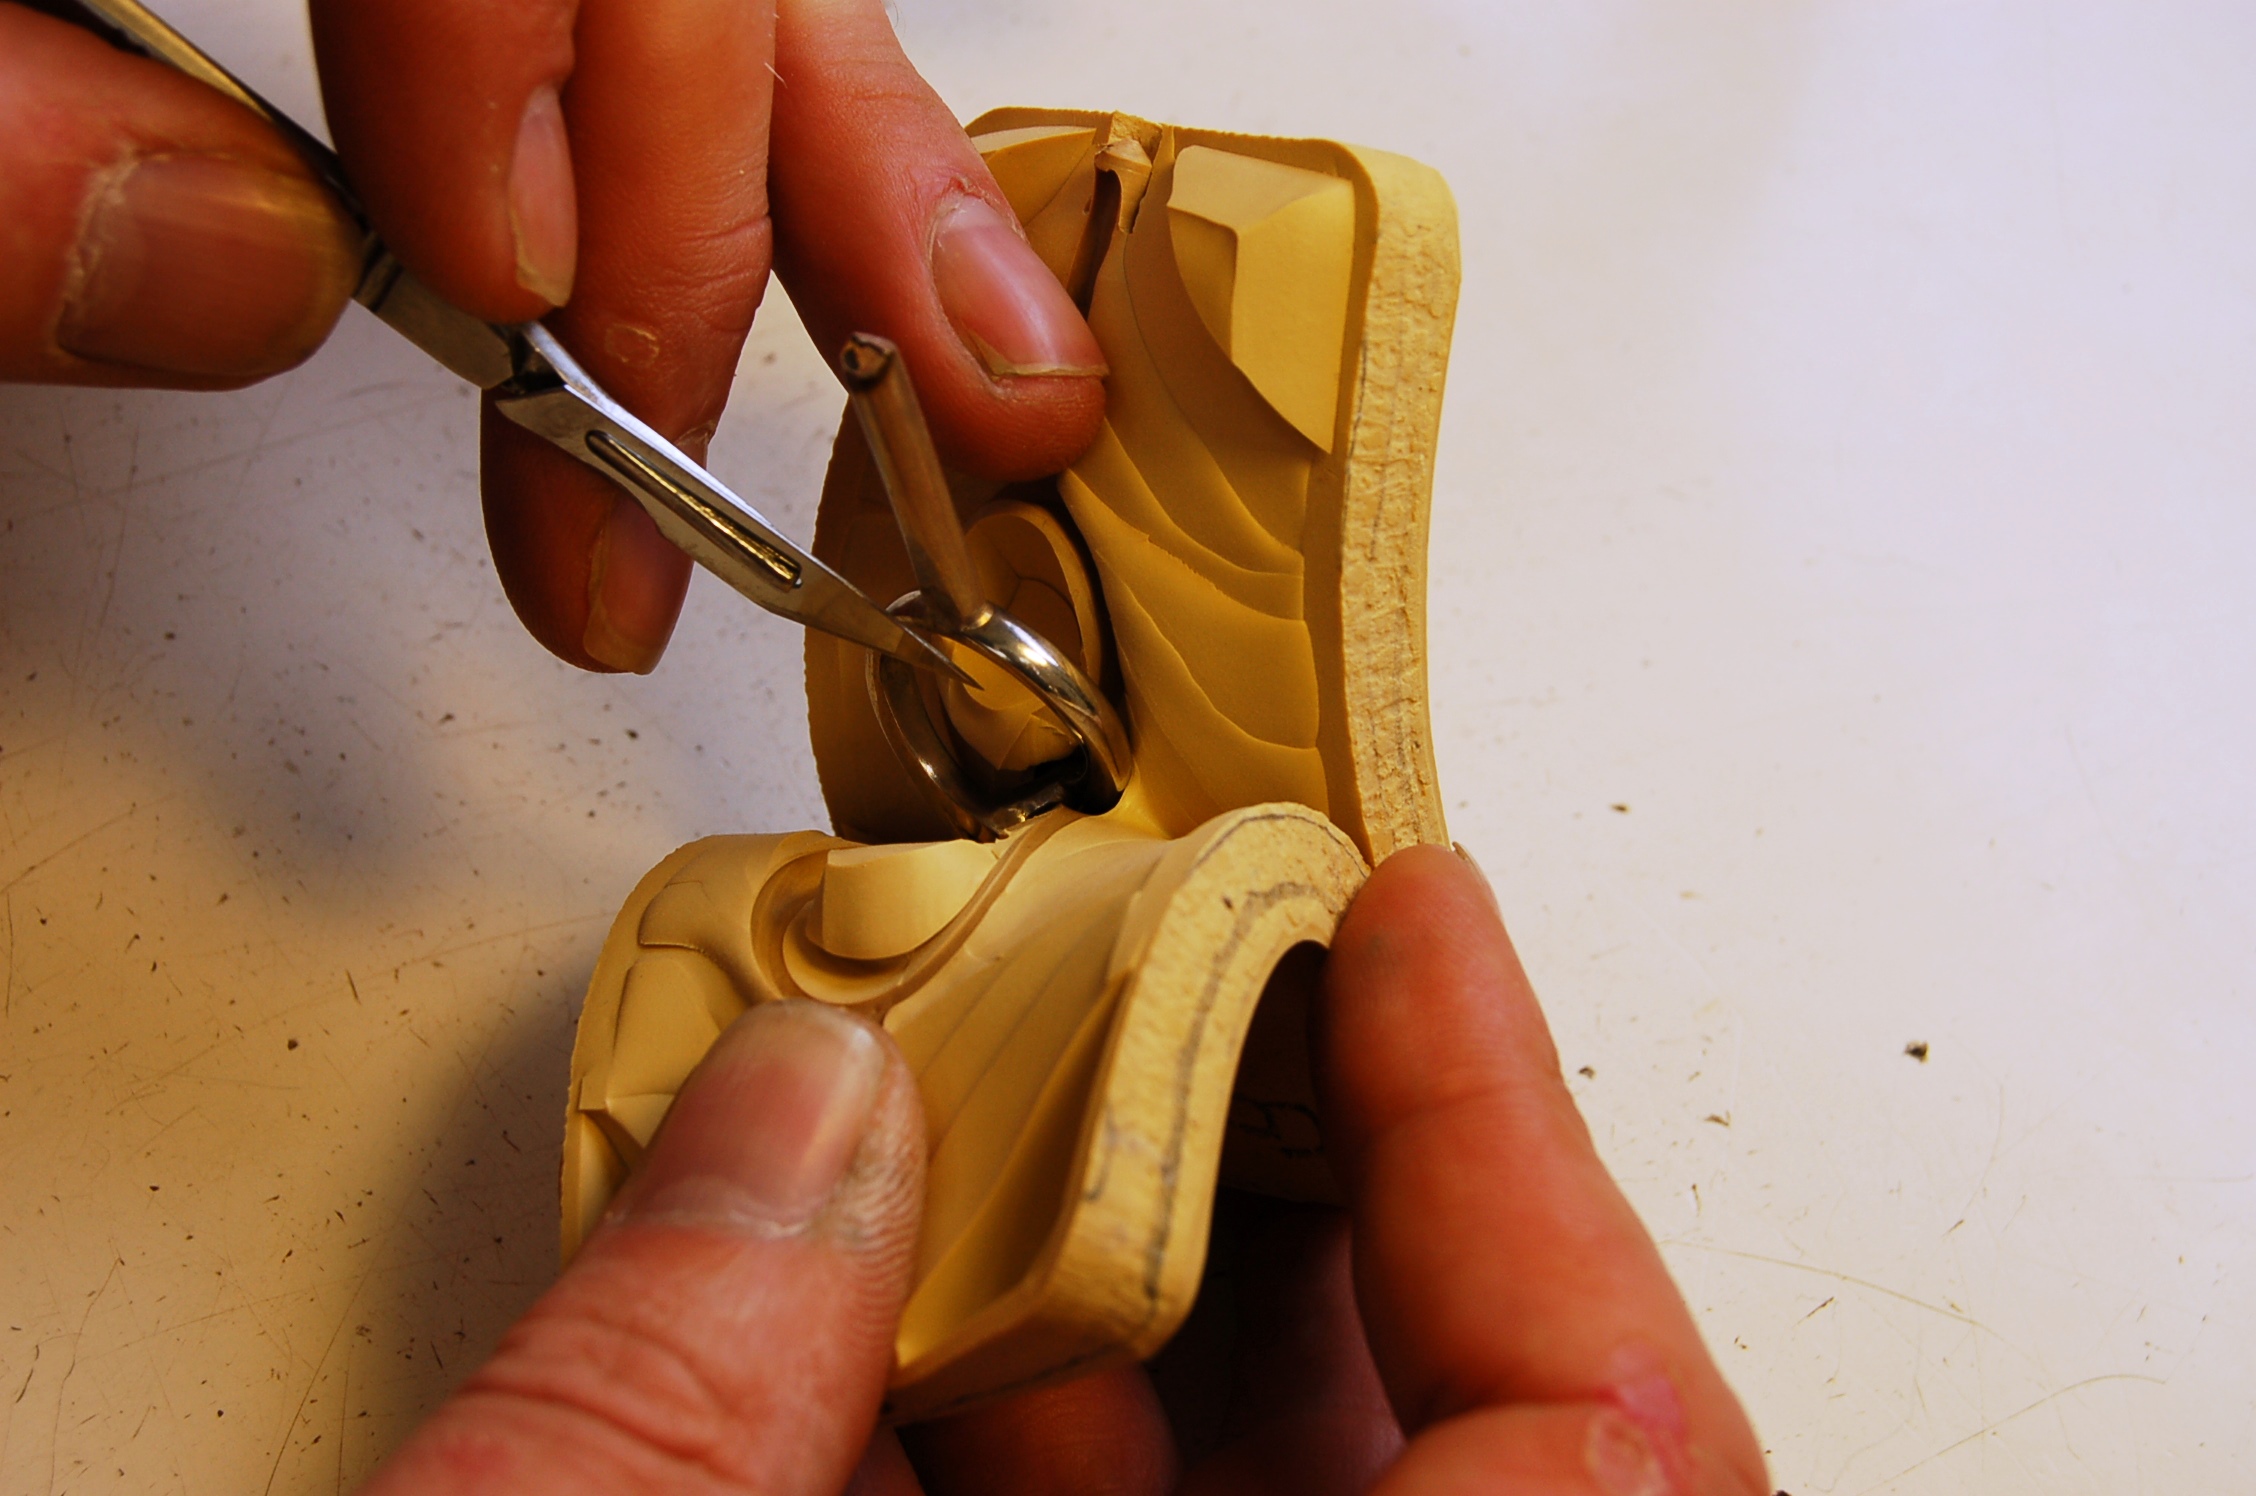
It is most important to plan the cutting to minimise the potential for join lines from the mould parting line. We also have to consider how best to cut, and vent the mould to allow for the easy extraction of the waxes to minimise possible damage or distortion. There are certainly primary patterns of cutting style for the majority of designs. However we are often presented with designs that require a unique solution, and no matter how well planned, and how well sketched, with complex items there is always a degree of working blind until you find the model within the rubber.
Cold moulding material is more difficult to cut than the vulcanised rubber, and with delicate sections is more prone to tearing. Therefore considerable extra care must be taken during the cutting process.

Vulcanised Rubber Moulds
This is the default moulding process for models that will withstand heat and pressure. The process makes use of sheets of natural rubber, which are built in layers into a metal mould frame. The model will be embedded within this sandwich of rubber sheets. The whole assembly is then placed in a heated press where a combination of heat and pressure will compact the rubber around the model, and cure the rubber to a stable condition. When the vulcanised block of rubber is removed from the press, the excess rubber is trimmed off, and then the mould is carefully cut with a surgical scalpel to create a two- part mould. The cutting of the mould is a highly skilled and precise process, as every consideration must me taken into account to help achieve the best possible results at the wax injection stage.
Cold Moulds
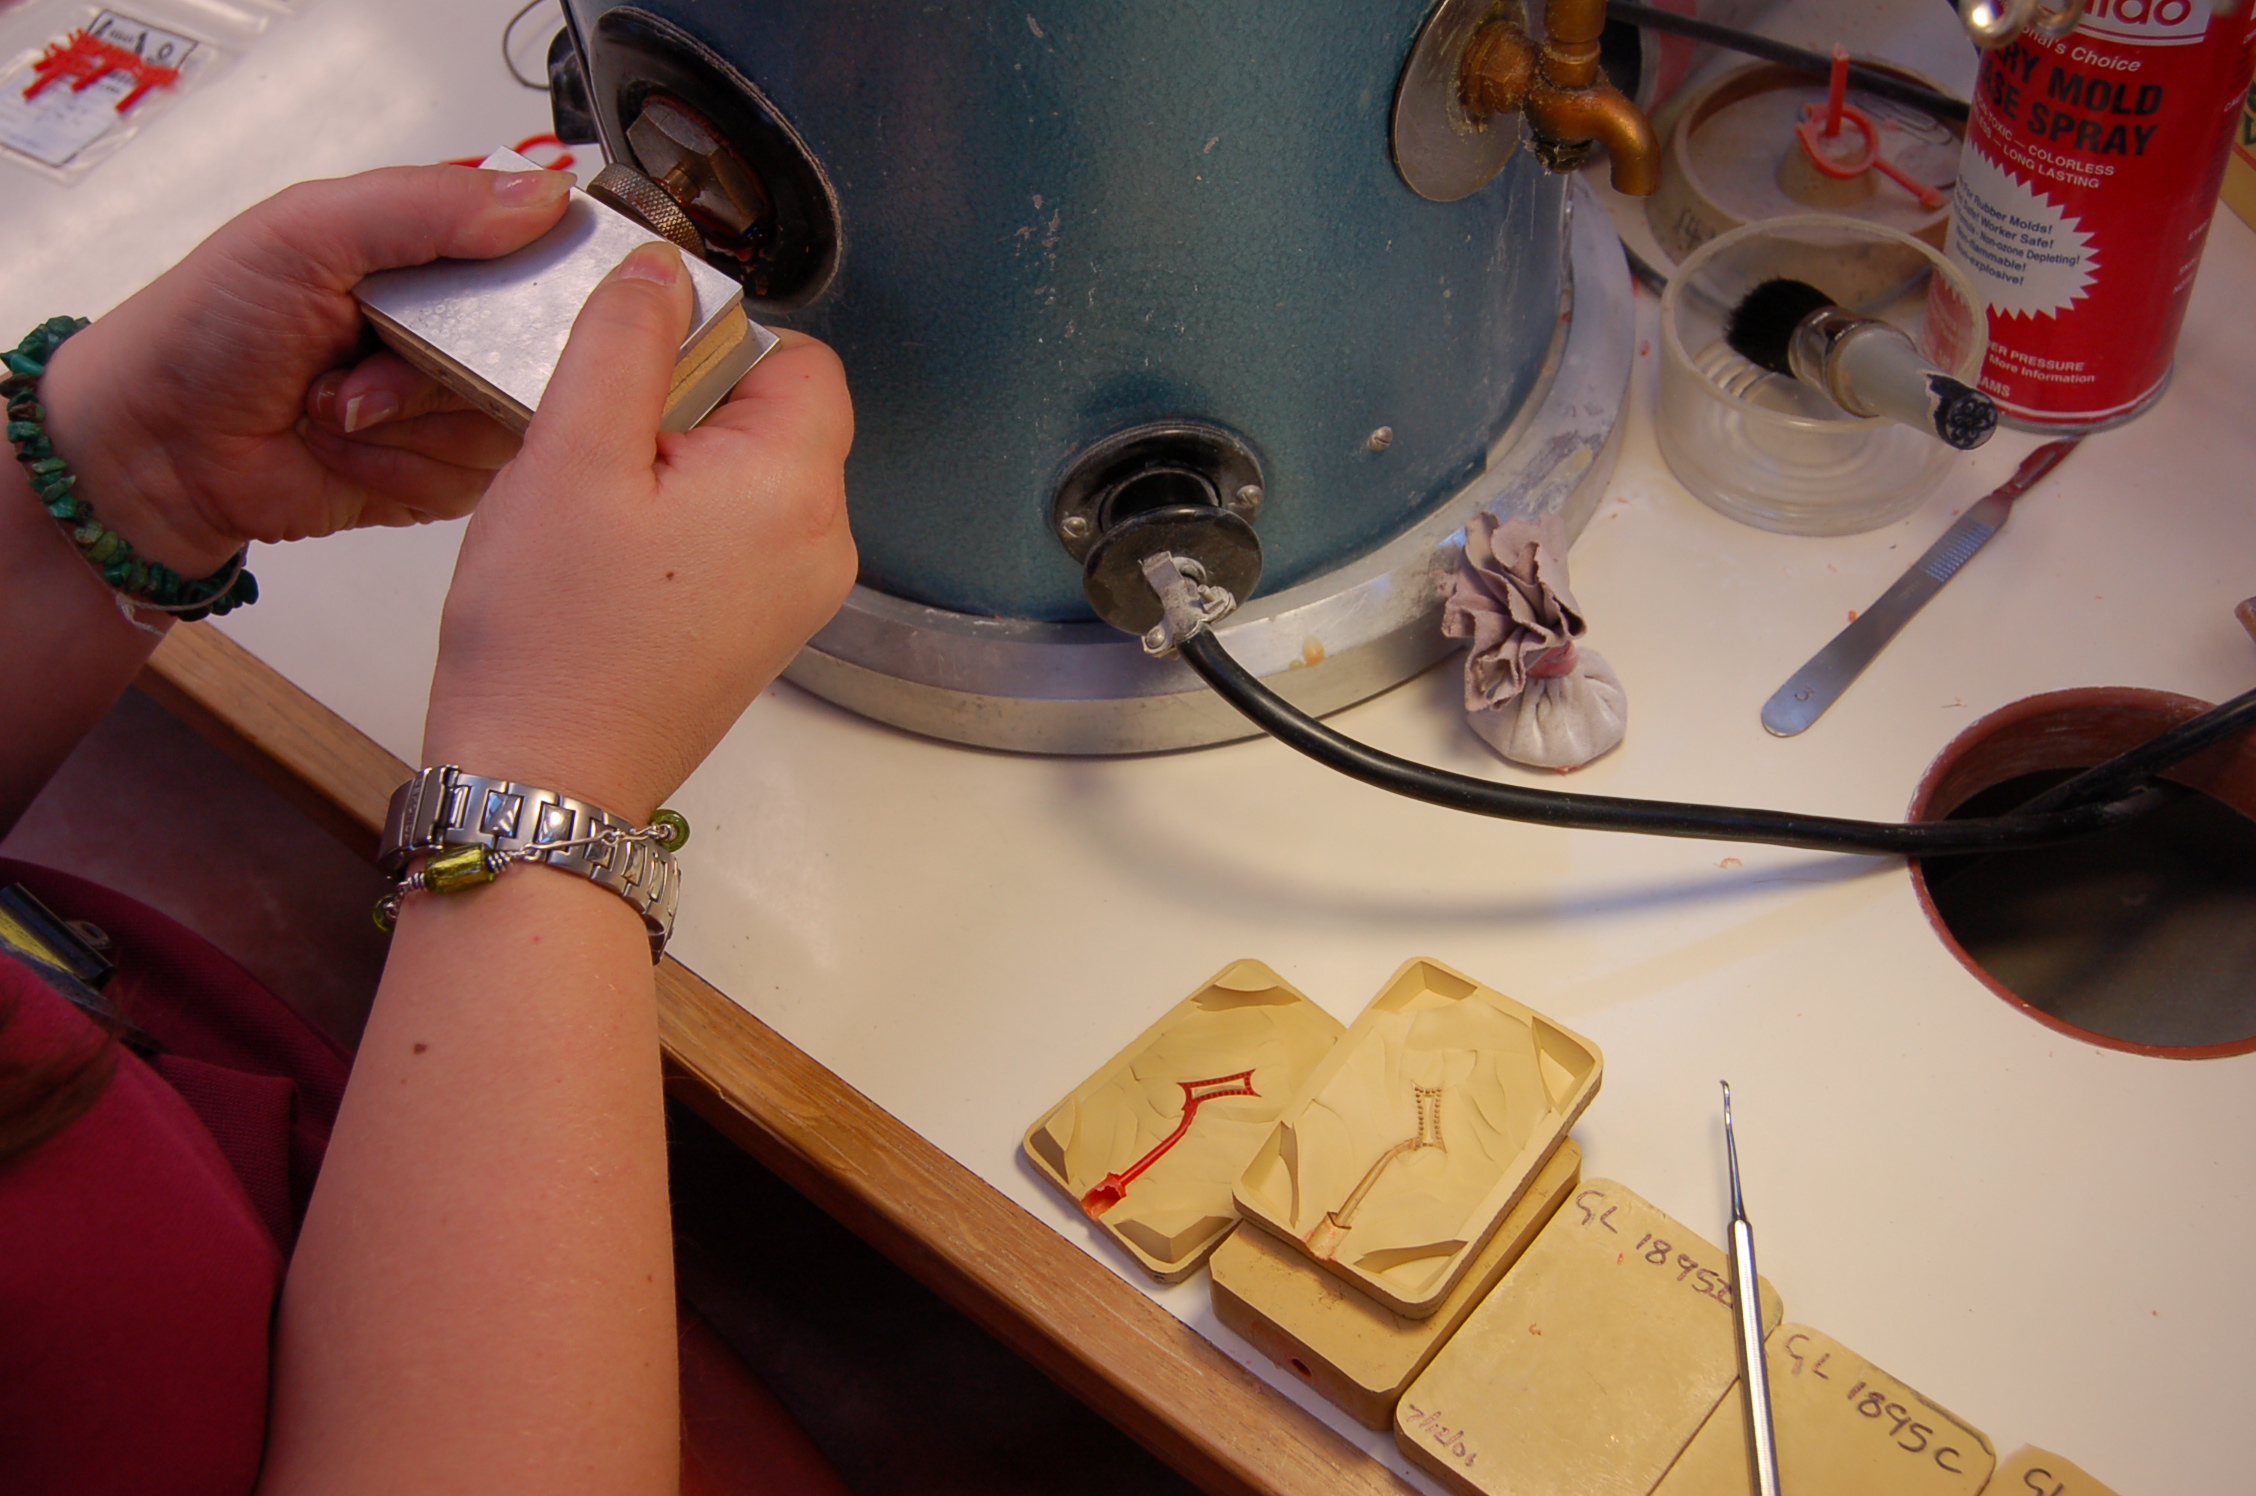
This is a process where a liquid silicon rubber solution is used at room temperature. The reasons for this more involved process is that this material does not suffer from shrinkage during or after curing. Hot moulds suffer from shrinkage. However, hot moulds are better for delicate sections, and the moulds generally have a better life span subject to usage.
The main reason for cold moulds are, no shrinkage at the moulding stage, delicate materials can be moulded without damage, including hand carved waxes, and waxes and resin models produced via the Cad/Cam process. However, cold moulds do not have the same durability of hot moulds, and delicate sections are more liable to fail.


Waxing from the Mould
From the completed moulds wax replicas are produced. This is a skilled manual operation with the operative having to adjust pressures and times of injection to achieve the optimum result. The waxes are carefully checked for defects such as, air bubbles, heavy join lines, flashing, sinkage, full formation of fine detail, and surface finish. The completed waxes are then passed to the building up department.
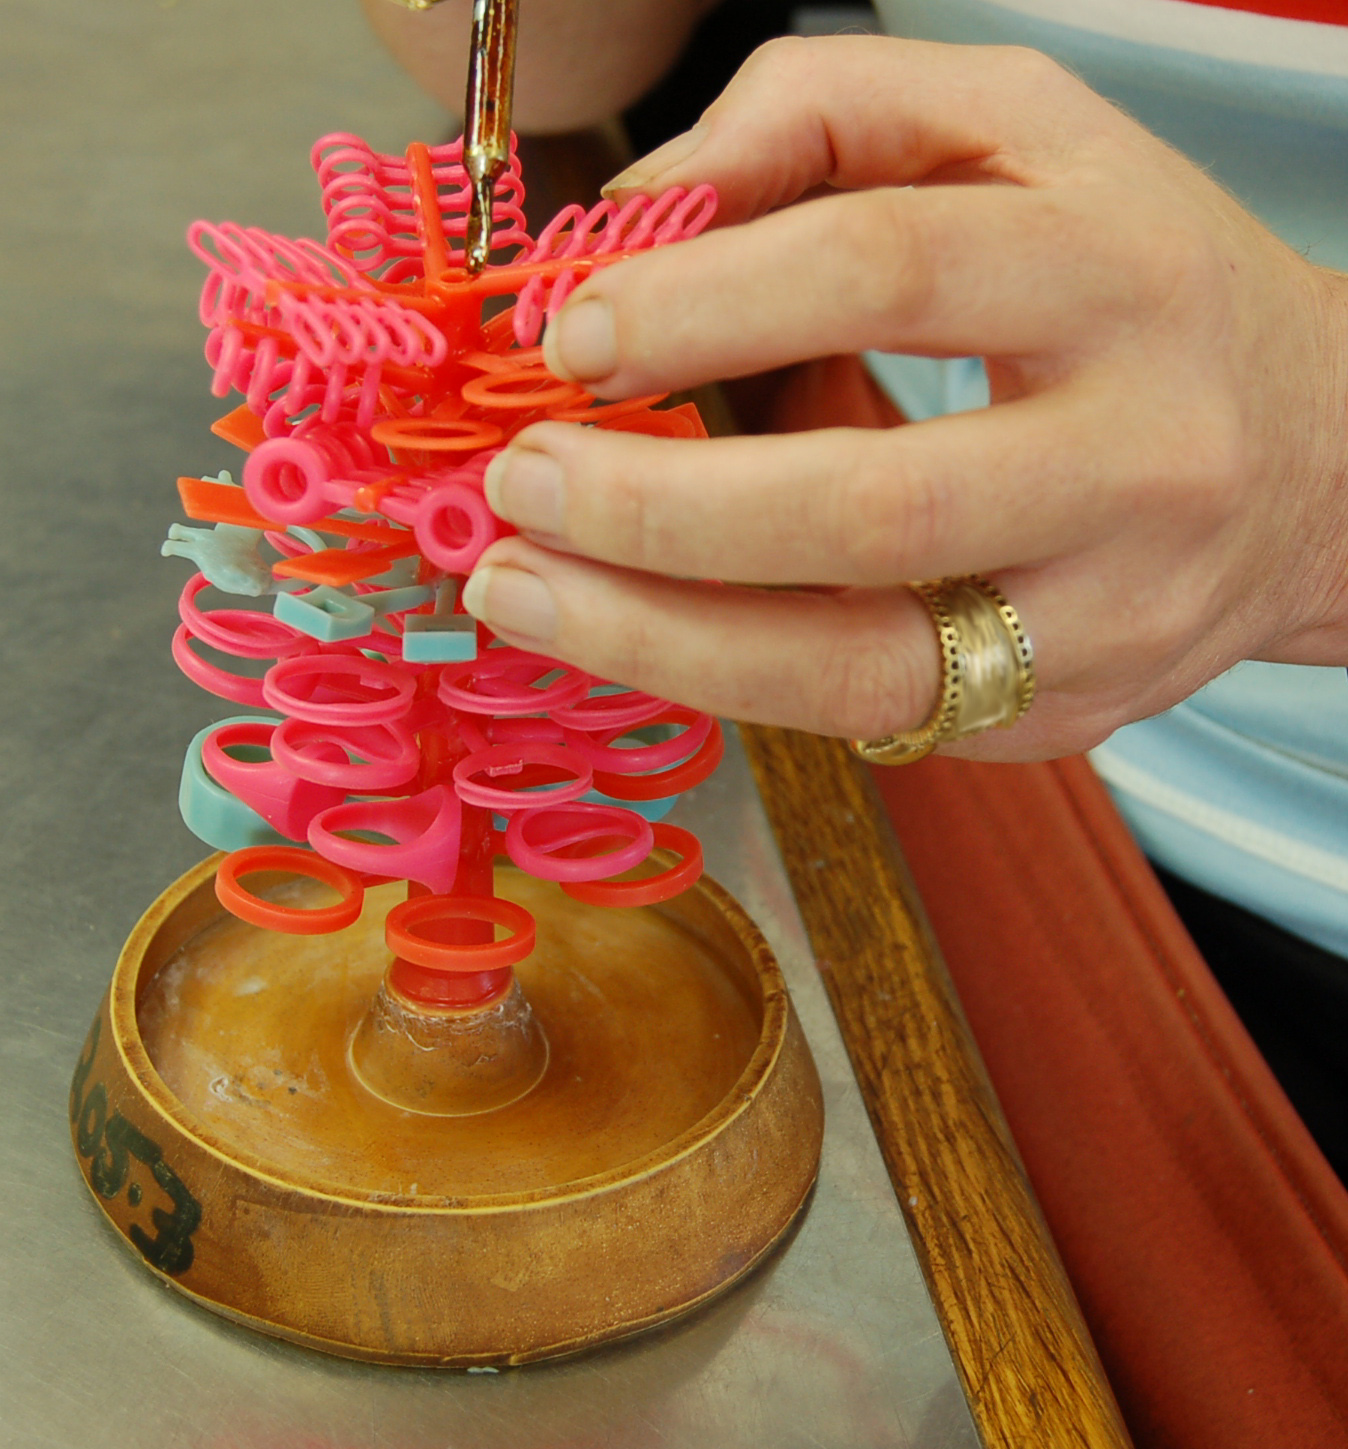
Building up the Tree
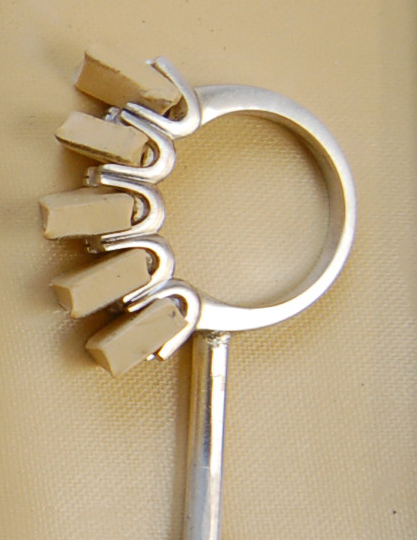
In the building up department we assess the waxes by size and mass to ascertain the best casting options. The general format tree will have lighter weight items towards the top of the tree, and heavier weight items will be positioned towards the lower part of the tree. Larger items may need special consideration in the manner they are built up and positioned in the tree. With heavy items the standard waxing feed may be dispensed with, and a still larger feed applied as required. Also with some larger, and heavier items they may be separated into a special tree requiring revised burnout and casting parameters.
When it comes to building up for platinum there are additional considerations to prevent the shrinkage hole effect often seen in heavier platinum casting just at the point of feed. We have developed many differing tree styles to accommodate special requirements.
Investing
The next stage is to embed the wax tree with a refractory material that will become the hot mould for the metal casting phase.
For Gold and Silver alloys the refractory material is Gypsum based. This is just like plaster of Paris in appearance and performance, however, there are special additives for high temperature performance. When the Gypsum moulds have set, the flasks are placed in the pre-heated furnace for the burnout cycle.
For Platinum casting a special Phosphate bonded material is required which is very pedantic regarding mixing requirements. The whole process is carried out under vacuum to get the optimum results. Again the flask is placed in the pre-heated furnace for a longer burnout cycle.
